Senin, 23 Januari 2012

Dapatkan 10 GB File Sharing Space untuk Menyimpan File di Internet


Bagi anda yang sedang mencari media penyimpanan online, ada sebuah situs file sharing yang akan memberikan space sebesar 10 GB secara gratis kepada anda. Fasilitas gratis ini bisa anda gunakan sebagai tempat penyimpanan data online, membackup data penting anda, maupun hanya sekedar untuk sharing file dengan teman-teman anda.
File sharing atau file hosting yang memberikan 10 GB space secara gratis ini adalah Minus. Minus merupakan layanan online storage yang bisa anda gunakan untuk menyimpan data-data anda secara online dengan aman. Minus sedikit berbeda dengan SugarSync. SugarSync lebih condong kepada backup storage untuk membackup data-data anda secara online, sedangkan jika Minus lebih condong kepada file sharing storage untuk berbagi file dengan teman-teman anda.
Dapatkan 10 GB File Sharing Space untuk Menyimpan File di Internet
Dengan Minus, anda bisa mengupload file kemudian mengatur privasi file anda menjadi private atau publik. File private tersebut berarti file anda tidak akan ditampilkan di hasil pencarian Minus search box. Setiap file yang anda upload akan memiliki short link (download link) yang bisa anda bagikan kepada teman-teman anda.
Minus memungkinkan anda untuk bisa menyimpan file di internet dengan mudah. Media penyimpanan online ini mendukung berbagai macam platform dengan teknologi terbaru seperti HTML5, Desktop (Mac, Windows dan Ubuntu), Android, iOS (iPhone), Chrome dan Firefox. Setiap aplikasi masing-masing platform tersebut bisa anda download disini.
Aplikasi Minus Dalam Berbagai Platform
Tertarik untuk menyimpan file dan berbagi file secara gratis melalui Minus Online Storage?
Untuk mendapatkan 10GB free space dari Minus, cukup klik disini dan daftarkan diri anda. Setelah anda terdaftar, anda akan mendapatkan 10GB free space dan akun Minus anda siap untuk digunakan.
Dapatkan 10 GB File Sharing Space untuk Menyimpan File di Internet
Selamat menyimpan file dan sharing file di internet secara gratis happy

Menyelamatkan File Yang Hilang dengan iCare Format Recovery Full Version


Pusat Gratis. Sobat PG yang pernah mengalami kehilangan data akibat media storage yang terformat, baik karena tidak sengaja atau karena virus atau bahkan karena install ulang darurat pasti merasa amat sangat kehilangan. Apalagi jika data – data yang hilang tersebut adalah data – data penting seperti dokumen kantor, tugas – tugas dll.
Nah..pada kesempatan kali ini PG akan mmebagi software yang bisa menyelamatkan file di media storage seperti hardisk, USB disk, SD card, hardisk portable dll yang telah terformat baik karena tidak sengaja maupun karena disengaja. Software ampuh ini adalah iCare Format Recovery.
iCare Format Recovery Full Version
iCare Format Recovery adalah software format recovery tools yang bisa sobat PG gunakan untuk mengembalikan data – data yang telah hilang karena terformat. iCare Format Recovery didesain secara khusus untuk mengembalikan dan menyelamatkan file microsoft office, foto, musik, video, dokumen – dokumen serta file-file penting lainnya.
iCare Format Recovery bisa mengembalikan hampir semua data yang hilang karena hardisk, USB disk, SD card, ataupun hardisk portable anda telah terformat baik secara sengaja maupun tidak sengaja.
iCare Format Recovery Support hampir semua file sistem seperti FAT12, FAT16, FAT32, NTFS hingga NTFS5. Bisa digunakan untuk mengembalikan file dan folder yang terformat baik itu secara keseluruhan maupun di partisi – partisi tertentu.
Bahkan iCare Format Recovery juga bisa menyelamatkan file di disk yang rusak (seperti disk yang bad sector dsb)
iCare Format Recovery memang bermanfaat sekali dan tidak salah jika sobat PG mendownloadnya. iCare Format Recovery bisa digunakan di windows 200 pro, windows 2000, windows NT, windows XP, windows 2003 server, windows 2008 server, windows vista dan windows 7
Bagi sobat PG yang ingin memiliki iCare Format Recovery full version silahkan lakukan langkah – langkah berikut ini :
1. Download iCare Format Recovery disini
2. Setelah proses download selesai, unzip ke folder yang sobat PG inginkan
3. double klik setup.exe dan install software
4. Masukkan key lisensi : 2K1XB2X964MPHOCJ8M1RYIJF0OVHFOFH
Ingat, key lisensi ini hanya bekerja untuk installer diatas saja..jadi download dan simpan installer berikut key nya baik – baik.
Ayo..siapa cepat dia dapat..bagi yang tidak dapat..silahkan langganan artikel PG secara gratis biar lain kali g ketinggalan lagi info – info penting seperti ini big grin

Membuat Dual Boot Pre-installed Windows 7 dengan XP


Pusatgratis – Bagi anda yang membeli laptop baru dengan pre-installed windows 7, namun anda tetap menginginkan menggunakan windows XP dengan alasan – alasan tertentu, maka solusinya adalah dengan menjadikan laptop anda tersebut dual boot. Untuk membuat laptop anda yang memiliki windows 7 pre-installed dual boot dengan windows XP, caranya sangatlah mudah. Berikut ini adalah cara membuat laptop dengan windows 7 pre-installed bisa di dual boot dengan windows XP :
1. Membuat partisi baru
Langkah pertama yang perlu anda lakukan adalah membuat partisi baru di hardisk anda. caranya adalah dengan Klik Start dan ketikkan partition atau disk management di search box. Pilih link create and format hard disk partition yang muncul di menu.
Search dan Pilih link
Setelah itu akan muncul tab disk management. Untuk membuat partisi baru, klik kanan Drive C: dan pilih shrink volume
Shrink Volume partisi baru
Tunggu sebentar saat muncul popup window
Popup Window
Popup Window
Masukkan besar space hardisk di partisi baru anda, sebagai contoh yaitu saya membuat 40GB space partisi baru. Setelah itu, klik Shrink
Masukkan Besar  Space Partisi
Masukkan Besar Space Partisi
Setelah proses tersebut selesai maka akan muncul partisi baru sebesar 40 GB namun masih unallocated space. Klik kanan dan pilih new simple volume
Pilih New Volume
Pilih New Simple Volume
Setelah itu pilih Format volume dengan file system NTFS dan centang perform a quick format, klik next
Klik Next untuk Format
Setela proses selesai, maka akan ada sebuah partisi baru di hardisk anda sebesar 40 GB
Partisi Baru telah Jadi
2. Menginstal XP di partisi baru
restart komputer anda dan boot dari CD bootable XP anda
Boot CD XP Bootable
Boot CD XP Bootable
saat ada pilihan partisi tempat instalasi, pilih partisi baru yang tadi anda buat.
Pilih Partisi Baru
Pilih Partisi Baru
Format partisi dengan NTFS file system (quick)
Quick Format Partisi
Lakukan instalasi seperti biasanya hingga selesai.
Install XP seperti biasa
3. Membuat Boot Loader
Setelah proses install windows XP selesai, maka saat anda menghidupkan laptop anda, anda akan langsung masuk ke windows XP. Hal ini dikarenakan Boot Loader XP mereplace Boot Loader windows 7. Untuk memunculkan menu pilihan boot (boot screen), maka anda bisa memanfaatkan freeware EasyBCD 1.72 atau versi terbarunya yaitu EasyBCD 2.0 beta.
EasyBCD
EasyBCD
Download EasyBCD 1.72 disini (Gratis)
Download EasyBCD 2.0 Beta disini (Gratis, namun anda harus terdaftar dalam forum Neosmart Technologies)
anda juga bisa menggunakan VistaBootPRO 3.3 (Gratis) yang bisa anda download disini.
VistaBootPro
VistaBootPro
Setelah membuat boot loader dengan bantuan freeware tersebut, maka saat booting akan muncul boot screen untuk memilih windows yang anda inginkan. Sebenarnya ini tidak hanya bisa di gunakan di windows 7, bisa juga dialikasikan di windows vista.
Muncul Dual Boot Screen Menu
Selamat mencoba..semoga bermanfaat happy

Kamis, 12 Januari 2012

Walkthrough: Creating XML Web Services with Visual FoxPro


XML Web services are the fundamental building blocks for distributed computing on the Internet. An XML Web service is an object or class that is deployed on the Internet and that you can access programmatically through typical method calls. XML Web services provide functionality and access to data between platforms and across diverse connections. The most important aspect of XML Web services is that because of how they use HTTP and SOAP, functionality is available through firewalls. You can call an XML Web service regardless of the platform you are running because HTTP and SOAP operate independently from your computer platform. In some cases, this can provide functionality that was unavailable under distributed COM.
You can create XML Web services or access them on the Web from wherever they are published. You can use Visual FoxPro to create an XML Web service, or you can use Visual FoxPro to access an XML Web service created in other programming languages.
This walkthrough explains how to create a COM Server and publish it as an XML Web service. Additionally, it guides you through using your newly created XML Web service. The XML Web service provides a list of customers from a table where the customers meet a certain requirement. The list is sent as an XML string that is then placed into a cursor using the XMLAdapter class.
This walkthrough contains the following sections:

Prerequisites

This walkthrough requires the following:
  • Microsoft Internet Information Services (IIS)

  • SOAP

  • Visual FoxPro COM Servers

SOAP is automatically installed when you install Visual FoxPro. IIS is an optional component for Windows 2000 and is automatically installed on Windows 2000 Server. IIS serves your XML Web services from your virtual directory to users on the Internet. Its virtual directory references the location on your hard disk where you place your XML Web services. You use Visual FoxPro to create COM objects. After your COM objects are created, you can then use the Visual FoxPro XML Web Service builder to publish them to your virtual directory.

Internet Information Services

IIS provides the reference to the location of your XML Web service to users accessing it from the Internet. To publish an XML Web service, you must create a virtual directory in IIS that contains the necessary Web Services Description Language (.wsdl) files. These files are created by the Web Service Wizard from your COM component.

To create a virtual directory

  1. In the main Visual FoxPro directory ..\Program Files\Microsoft Visual FoxPro VersionNumber, create a folder named Web Services.
  2. In the Windows Control Panel, double-click Administrative Tools, and then double-click Internet Information Services.
    The Internet Information Services window opens, displaying a tree control on the left that displays a list of Internet information services on your computer.
  3. Right-click the Default Web Site node.
  4. Click New, and then click Virtual Directory to open the Virtual Directory Creation Wizard.
  5. Follow the instructions in the wizard, and specify the Web Services folder that you created in step 1 as your virtual directory.
    This virtual directory references the Web Services folder where you will store all the XML Web service files you create.

Creating a COM Server

Because an XML Web service is a dynamic-link Library (.dll) or executable (.exe) file, you must use a COM Server as the basis for your XML Web service. A COM Server in Visual FoxPro is a file with a .dll or .exe extension, containing a custom class based on the Session object. The custom class is specified as OLEPUBLIC when it is defined. This exposes functionality that can be used and reused by other applications through automation.
For this COM Server example, you create a custom class that reports some basic information. You write a program that creates a class with one method, compile the project containing it into a COM Server, and then publish it as an XML Web service.

To create a COM Server

  1. On the File menu in Visual FoxPro, click New.
  2. In the New dialog box, click Project, and then click New file. Save the project as myWServ1.
  3. In the All tab of Project Manager, expand Code, click Programs, and then click New.
  4. Copy the following code into the Editing window.
     Copy Code
    DEFINE CLASS ShowCustomers AS Session OLEPUBLIC
       PROCEDURE CustomersInGermany AS String
          LOCAL loXMLAdapter AS XMLAdapter
          LOCAL lcXMLCustomers AS String
    
          loXMLAdapter = CREATEOBJECT("XMLAdapter")
          
          OPEN DATABASE "C:\Program Files\Microsoft Visual FoxPro ;
             VersionNumber\" + "Samples\Northwind\northwind.dbc"
    
          USE customers
          SELECT * ;
             FROM customers ;
             WHERE country LIKE "Germany%" ;
             INTO CURSOR curCustomers
    
          loXMLAdapter.AddTableSchema("curCustomers")
          loXMLAdapter.UTF8Encoded = .T.
          loXMLAdapter.ToXML("lcXMLCustomers")
    
          CLOSE DATABASES ALL
    
          RETURN lcXMLCustomers
       ENDPROC
    ENDDEFINE
    This program defines one class, ShowCustomers, that has one method, CustomersInGermany.
  5. On the File menu, click Save.
  6. In the Save As dialog box, name the program myWServ1, and click Save.
  7. Close the Editing window.
  8. In Project Manager, click Build.
  9. Select Multi-threaded COM server (dll), click OK, and accept the name myWServ1.
Visual FoxPro now compiles the file myWServ1 into a COM Server called myWServ1.dll. You can now publish it as an XML Web service.

Creating and Publishing an XML Web Service

From the myWServ1.dll file, created in the previous procedure, a new Web Services Description Language (.wsdl) file is generated when you publish the XML Web service. The .wsdl file is an XML file that describes the XML Web service and the classes it contains.
To add the components necessary to turn your COM Server into an XML Web service, you must compile the COM Server as an XML Web service. After you specify the settings in the Web Services Publisher, Visual FoxPro creates the SOAP files necessary to turn your COM Server into an XML Web service, publishes them in your virtual directory, and registers your new XML Web service in IntelliSense.

To compile and publish an XML Web service

  1. On the Tools menu, click Task Pane.
  2. In the Task Pane Manager, click XML Web Services.
  3. Under XML Web Service Tools, select Publish Your XML Web Service.
  4. If the file myWServ1.dll is not listed in the COM Server field, click the ellipsis (...) button, and select myWServ1.dll.
  5. Click Advanced to display the Visual FoxPro XML Web Services Publisher dialog box.
  6. Make sure the Listener URI box displays your virtual directory. If it does not, click the ellipsis (...) button, and select your virtual directory.
  7. Click the Methods tab, and make sure that CustomersInGermany is selected.
  8. Click the Namespaces table, replace tempuri.org with your domain in all fields, and click OK.
    If you do not have your own domain, you can leave tempuri.org for this example.
  9. Click OK to close the Visual FoxPro XML Web Services Publisher dialog box.
  10. Click Generate.
    Visual FoxPro generates the XML Web service files. After it is finishes, the XML Web Services Publishing Results dialog box appears, displaying a list of files generated, .wsdl file, ISAPI or ASP listener, and whether the file was generated properly.
At this point, you have created and published your XML Web service. Anyone who has access to the virtual directory you established earlier can use HTTP to access the XML Web service you published.

Testing an XML Web Service

After you have published your new XML Web service, you should test it to make sure it is working correctly. Visual FoxPro provides a mechanism to test XML Web services that is available in the XML Web Service pane in Task Pane Manager. The test mechanism displays any results returned from the XML Web service, XML schemas used, error feedback.

To test a XML Web service

  1. On the Tools menu in Visual FoxPro, click Task Pane.
  2. In Task Pane Manager, click XML Web Services.
  3. Under Explore an XML Web Service, click ShowCustomers in the Service Name box.
  4. In the The following methods are supported by this XML web service box, click CustomersInGermany.
    This box lists all the available methods on the XML Web service.
  5. Click Test this XML Web Service.
If testing is successful, the Web Service Test Results window appears. It displays the results from the XML Web service, and you can view the .wsdl file associated with the XML Web service. If there is an error in testing, the Web Service Test Results window displays information on the error.

Using an XML Web Service

You use an XML Web service the same way you would any COM Server: to expose functionality of one application to another. In the following procedure, you create a program (.prg) file to access your XML Web service and use the Toolbox to add the required code that references the XML Web service properly.

To use an XML Web service

  1. On the File menu in Visual FoxPro, click New.
  2. In the New dialog box, select Project, and click New file. Save the project as wsTest.
  3. On the All tab of Project Manager, expand Code, select Programs, and then click NewOn the Tools menu, click Toolbox.
  4. In the Toolbox, click the My XML Web Services.
  5. Click and drag the ShowCustomers XML Web service from the Toolbox to the Editing window.
    This adds the proper code to your XML Web service.
  6. In the Editing window, below the line that reads, "Call your XML Web service here," insert the following code.
     Copy Code
    LOCAL lcXML, lcAlias AS String
    LOCAL loXMLAdapter AS XMLAdapter
    
    lcXML = loShowCustomers.CustomersInGermany
    
    loXMLAdapter = CREATEOBJECT("XMLAdapter")
    loXMLAdapter.LoadXML(lcXML)
    
    lcAlias = loXMLAdapter.Tables.Item(1).Alias
    loXMLAdapter.Tables.Item(1).ToCursor()
    
    SELECT(lcAlias)
    BROWSE
    CLOSE DATABASES ALL
  7. On the File menu, click Save.
  8. In the Save As dialog box, name the program WebServiceTest, and click Save.
  9. Close the Editing window.
  10. In Project Manager, select the WebServiceTest program file, and click Run.
    A browse window appears with all the customers from Germany selected in the Northwind database. This cursor was populated from XML provided from your XML Web service using the XMLAdapter class. 

Walkthrough: Creating Web Services with Visual FoxPro


McAlister Merchant
Microsoft Corporation
March 2001
Applies To: Microsoft Visual FoxPro 7.0
Summary: Web Services can be available anywhere. You can either create them yourself or access them over the Web from wherever they happen to be published. You can use Visual FoxPro to create Web Services, and if you register them in IntelliSense, Visual FoxPro makes it possible for you to access them almost automatically. You also can use Visual FoxPro to access Web Services created in other languages. (6 printed pages)

Contents

Introduction
Web Services
Establishing a Virtual Directory
Creating a Project
Creating a COM Server
Creating and Publishing a Web Service
Registering a Web Service
Using a Web Service

Introduction

Creating Web Services using Microsoft® Visual FoxPro® 7.0 is a complex process that involves using Microsoft® Internet Information Services (IIS), Visual FoxPro COM servers, and Simple Object Access Protocols (SOAP). You can use IIS, which installs automatically with Visual FoxPro, to create a virtual directory that references the location on your hard disk where you place your services.
Then, you can use the Project manager to create or to compile COM objects. When the COM objects are created, you can use the Visual FoxPro Web Services wizard to publish them in your virtual directory.
You can use the IntelliSense manager to register Web Services with Visual FoxPro, so that the placement of the Web Service and necessary calling routines in code is expedited.
This paper walks you through the processes involved in making Web Services of your existing COM servers and preparing Web Services for use. From a COM server, you create a very simple Web Service that is accessible by anyone through HTTP. This Web Service provides a simple report of the current directory and how many .jpg files are there.

Web Services

Web Services extend the accessibility to your own COM servers, as well as making Web Services from other developers accessible to you through your browser.
Web Services provide functionality and access to data between platforms and across diverse connections. You create and use Web Services to provide or to gain functionality from wherever it happens to reside. The most important aspect of Web Services is that, because of the way they use the HTTP protocol and the SOAP proxy, functionality is available through firewalls. Because HTTP and SOAP are platform agnostic, Web Services are also platform agnostic. In some cases, this can provide functionality that was unavailable under COM alone.
To publish a Web Service, you must create a virtual directory in IIS, and then create or copy a COM server from which you generate a Web Service to your virtual directory.

Establishing a Virtual Directory

You must create or identify a directory into which you will place your Web Services. Although you can use an existing directory, you might want to create a separate place on your hard disk to store these files, making it easier to manage your Web Service files.

To create the virtual directory:

  1. Create a folder named Web Services in the main Visual FoxPro directory (C:\Program Files\Microsoft Visual FoxPro 7).
  2. In the Administrative Tools folder of the Microsoft Windows® control panel, double click the Internet Services Manager shortcut.
  3. The Internet Information Services window opens, displaying a tree in the left pane that shows your hard disk. Expand this node to see available sub folders.
  4. Select the Default Web Site node in the Tree pane
  5. From the right-click menu, select New, and click Virtual Directory. This opens the Virtual Directory Creation wizard.
  6. Follow the steps in the wizard, and specify the Web Services folder that you created earlier as your virtual directory.
You have created a virtual directory that references the Web Services folder in which you will store all the Web Services files you create.

Creating a Project

The Project manager is the most fundamental application-building tool in Visual FoxPro. Within a Visual FoxPro project, you can assemble documents of all types, data, classes, code, and other file types. A project provides access to all the components you might want to include in a server and contains them for compilation. In this example, you use the project to compile your Web Service.

To create a project:

  1. In the File menu, select New.
  2. In the New dialog box, select Project, and click New file.
  3. In the Create dialog box, select the Web Services folder you created earlier, and name your project myWServ1.
  4. Click Save.
Now, you have created your project in the Web Services folder. This makes it possible for you to save and compile the project to the correct folder automatically when you have finished adding components to it.

Creating a COM Server

Because, a Web Service is a .dll or .exe file, you must use a COM server as the basis for your Web Service. A COM server in Visual FoxPro is a file with .dll or .exe extension containing a class built as OLEPUBLIC from a project. Objects specified as OLEPUBLIC are accessible by Automation clients. From the .dll file, a new .wsdl file will be generated when you publish the Web Service. This .wsdl file has the necessary XML code that describes the classes in the .dll and references which .dll file is the driving force behind that particular Web Service.
For this COM server example, you will create a custom class that reports some very simple information. In this process, you will write a program that creates the class with two methods and compile the project containing it into both a COM server and then a published Web Service.

To create a simple class:

  1. In the File menu, select New.
  2. In the New dialog box, select Project, and click New file. This opens the Project Manager.
  3. In the All tab of the Project Manager, expand Code, select Programs, and then click New.
  4. Copy the following code into the code edit window.
    *-- returns curdir() and number of JPEG files
    
    DEFINE CLASS showem AS session OLEPUBLIC
    
       Name = "showem"
    
       PROCEDURE justshow
       howmany=ADIR(afilArry,"*.jpg")
       IF howmany <1
          fileNm="no"
       ELSE
          fileNm=ALLTRIM(STR(howmany))
       ENDIF
       
       X = "about   " + CURDIR() + " ... "
       Y = "There are "  + fileNm + " JPEG files here."
       RETURN x + y 
       ENDPROC
    ENDDEFINE
    
    This program defines one class, showem, which has one method, justshow.
  5. Close the edit window. In the Save As dialog box, name the program myWServ1, and click Save.
  6. Make sure myWServ1 is set to Main. (You can tell if it is set to Main, because it will be in bold font.) If it is not, in the Project Manager, right-click myWServ1 and click Set Main in the shortcut menu.

To compile the COM server:

  1. In the Project Manager, click the Build button.
  2. Select Single-threaded COM server.
  3. Click OK, and accept the name myWServ1.
Visual FoxPro will compile the myWServ1 file into a COM server, after which you can turn this COM server into a Web Service.

Creating and Publishing a Web Service

To add the components necessary to turn your COM server into a Web Service, you must compile the COM server as a Web Service. After you specify the settings, Visual FoxPro creates the XML and SOAP files necessary to turn your server into a Web Service, registers your new Web Service, and publishes it in your virtual directory.

To compile and publish a Web Service:

  1. After you have completed the previous procedures and compiled the COM server myWServ1.dll, right-click the Project Manager, and choose Builder from the shortcut menu.
  2. In the Wizard Selection dialog box, choose Web Services Publisher, and then click OK.
  3. In the Visual FoxPro Web Services Publisher dialog, use the Ellipsis button (...) to locate myWServ1, and then select the class you want to register from that server. In the COM server you created, myWServ1, you have only one class, showem.
    Note   It is a good idea to click the Advanced button to make sure the Web Services Publisher dialog box is referencing the correct files, especially if you have created similarly-named servers or services in different folders. If the correct file is not displayed in the drop-down list, use the Ellipsis button (...) to locate the correct file. The IntelliSense scripts field displays the name under which you (and the SOAP toolkit) will find this Web Service. After verifying the information in the Advanced Web Services Publisher dialog box, click OK.
  4. Click the Generate button. After Visual FoxPro generates the Web Service files, the Web Services Publishing Results dialog box appears, displaying a list containing the COM server, .wsdl file, ISAPI or ASP listener, and IntelliSense path names and compilation results.
At this point, you have created and published your Web Service. Anyone who has access to the virtual directory you established earlier can use HTTP to access the Web Service you just created.
To use this Web Service, someone must write code that invokes the SOAP client, a listener, and the browser and must employ several layers of protocol and process. In Visual FoxPro, this is simplified by registering Web Services in the IntelliSense manager.

Registering a Web Service

You can register Web Services (both those created by you and those created by others) in the IntelliSense manager. When you do this, IntelliSense provides the supporting code whenever you access a registered Web Service.

To Register a Web Service:

  1. On the Tools menu, select Intellisense Manager.
  2. On the Types tab of Intellisense Manager, click the Web Services button to register your new Web Service (your new class also will appear in the Types list).
Now, IntelliSense will provide your Web Service as an optional selection whenever you add a strongly typed variable to your Visual FoxPro code.

Using a Web Service

You use a Web Service the same way you would any COM server to expose functionality of one application to another application or program. For example, you can create a Visual FoxPro program that calls the sample Web Service, myWServ1. In a Visual FoxPro program, declare a strongly typed variable as in the following line of code, in which you reference your Web Service, myServ1, by choosing it from the IntelliSense drop-down list:
LOCAL x AS myWServ1
Visual FoxPro IntelliSense uses the registered information on this Web Service to complete the following lines of code:
x = CREATEOBJECT("MSSOAP.SoapClient")
x.MSSoapInit("http://TheVirtualDisk/web services/ myWServ1.WSDL", , " myWServ1SoapPort")
Then, you call the method of that Web Service just as you do any COM object or class method as in the following code:
? x.justshow()
You can add similar code to access your own or other Web Services to Visual FoxPro programs and applications.
For more information on Web Services, see "Web Services Overview" in the Visual FoxPro Help. For more information on COM servers, see "Creating Automation Servers" in the Visual FoxPro Help.

Senin, 02 Januari 2012

CARA MENDAFTAR DAN PERATURAN GOOGLE ADSENSE


Apakah anda selama ini selalu gagal mendaftar di Adsense ? lalu, apa permasalahan anda sehingga selalu di tolak oleh Adsense sebagai publisher ? Mungkin saya bisa memberikan solusinya.
Pengalaman saya beberapa kali ditolak oleh Google Adsense saat mendaftar sebagai publisher, yah akhirnya setelah berbagai cara akhirnya diterima juga.

Bagi yang belum tahu apa itu Adsense, saya jelaskan secara singkat:

Google Adsense adalah salah satu cara / solusi mencari duit / uang di internet, jadi , kita dibayar karena website kita menampilkan iklan yang berupa potongan script yang ditempelkan di situs kita.

Tentang cara / mekanisme iklan itu bekerja, untuk sementara anda tidak perlu tahu, yang penting saya memberikan solusi / tips supaya anda bisa diterima secara cepat / kilat hanya dalam 1-3 hari, malahan mungkin dalam hitungan kurang dari 24 jam (…itu berdasarkan pengalaman saya lhoo..)

Mungkin agak tricky apa yang saya tulis di artikel ini , tetapi it’s ok lah .. selama kita bisa mencari devisa buat negara kita.

Langkah-langkah yang mesti anda perhatikan adalah:

[a] Apakah anda sudah pernah ditolak setelah mendaftar sebelumnya ke Google Adsense ?

Jika pernah, apa yang menjadi masalah / alasan mereka ketika situs anda di tolak ?

Apakah situs anda berbahasa Indonesia ?

Jika ya, bukan masalah, anda bisa mendaftar lagi….

Jika tidak, lalu apakah situs anda berisi content pornografi ?

Jika ya, lalu apakah situs anda berada di blogspot / blogger ?

Jika situs anda ditolak karena berisi content pornografi yang berada di blogspot / blogger, LUPAKAN UNTUK MENDAFTAR KEMBALI DENGAN ALAMAT YANG SAMA. Gunakan alamat lain untuk mendaftar kembali.

[b] Anggap saja anda tidak pernah mengenal apa itu Adsense, dan tidak pernah mendaftar sebelumnya. Saya akan berikan tips kilat kepada anda. Langkah-langkah yang perlu ambil supaya mudah di approve Google Adsense sebagai publisher adalah :

1. Bikin account di Blogger, caranya, kunjungi :

http://www2.blogger.com/

2. pilih “CREATE YOUR BLOG NOW”

3. Isi form data2 anda dari email address, Password, Display Name, Word Verification, dan centang Acceptance of Terms sebagai persetujuan anda mengikuti aturan mereka.

4. Beri judul Blog anda, dan berikan nama URL alamat blogspot anda.

5. Pilih template yang cucok dengan selera anda.

6. Setelah itu “START POSTING” artikel baru ?

Tunggu dulu….

7. Jika anda yang tidak fasih dalam bahasa inggris atau mengalami kesulitan mencari ide, lebih baik anda COMOT dari Internet Artikel-artikel yang berbahasa Inggris.

Saya pakai istilah PINJEM, bukan NYOLONG artikel, karena begitu SITUS BLOGGER kita diapprove google adsense, anda bisa hapus dan ganti dengan artikel berbahasa Indonesia.

8. Setelah “MEMINJAM” artikel orang lain di internet, baru START POSTING..

9. Muntahkan semua artikel yang baru anda “PINJEM” dari orang lain yang berbahasa Inggris ke artikel pertama anda.

Ingat : USAHAKAN NYARI ARTIKEL YANG PANJANG (walaupun anda tidak tahu apa isinya)

Saran saya : comot dari wikipedia atau answer.com, atau lebih baik, di campur aduk (jaga2 siapa tahu sekarang Google mempunyai teknik baru dalam melacak copyright artikel lain di internet).

10. Setelah postingan artikel pertama anda berhasil, mulailah sign up / register / daftar dengan klik gambar button di atas.

Daftarlah dari gambar berlogo Google Adsense (klik dari gambar),

kemudian pilih BUTTON:
CLICK HERE TO APPLY seperti gambar dibawah:


dan lengkapi data diri anda di formulir isian yang nantinya disodorin mereka. Hati-hati dalam pengisian, biasanya kita terjebak saat mengisi WEBSITE LANGUAGE kita, lebih baik kita memilih ENGLISH, karena kalau anda mengisi website anda berbahasa Indonesia, anda akan di tolak mereka.

11. Jangan lupa juga isi nomor telepon anda di mulai dengan prefix 62, misalnya nomor telpon anda 02167424433, maka isilah nomor telp dengan 622167424433

12. Anda akan dikirimkan email notifikasi bahwa anda adalah pemilik sah EMAIL yang anda daftarkan, kemudian anda disuruh mengclick URL yang dikirimkan mereka.Setelah itu ….

13. Centang semua jika muncul :


AdSense applicants must agree to adhere to AdSense program policies (details)

I agree that I will not click on the Google ads I’m serving through AdSense.

I will not place ads on sites that include incentives to click on ads.

I agree that I can receive checks made out to the payee name I have listed above.

I will not place ads on sites that include pornographic content.

I certify that I have read the AdSense Program Policies.


14. Centang pilihan pertama jika muncul :


Would you like to have a single account for all Google services?

You can use your existing Google account email address and password for AdSense as well. Or you can choose new ones just for AdSense.


1. I’d like to use my existing Google account for AdSense.

2. I’d like to choose a new login name and password just for AdSense.

Setelah itu akan muncul KOTAK isian LOGIN, lalu loginlah dengan username dan password yang sama dengan username / password yang anda daftar di WWW2.BLOGGER.COM itu.

13. Tunggu email dari mereka beberapa hari kemudian, yang berisi “CONGLATURATIONS !!”

Peraturan Tentang Google Adsense
Tulisan berikut diambil dan diterjemahkan dari halaman Google AdSense Program Policies dengan tujuan untuk memudahkan publisher AdSense Indonesia untuk memahami dan mengerti aturan2 yg diterapkan oleh Google berkaitan dengan program Google AdSense mereka. Setiap pelanggaran aturan yg dilakukan oleh publisher, sekecil apapun, akan dapat menyebabkan keanggotaan AdSense mereka dihapus oleh Google.

Sekedar informasi, artikel berikut ditulis berdasarkan update ketentuan Google AdSense Program Policies pada bulan Januari 2007. Sewaktu-waktu, Google akan melakukan perubahan/penambahan/pengurangan aturan mereka, jadi untuk informasi yg lebih up-to-date, silahkan langsung mengacu pada halaman Program Policies mereka.

Semoga bermanfaat!

Klik dan Impresi Yg Tidak Valid


Segala klik pada ad units harus berasal murni dari keinginan pengunjung. Berbagai cara untuk menciptakan klik atau impresi pada ad units secara keras tidak diperbolehkan. Ini meliputi, tapi tidak terbatas pada, klik atau impresi berulang yg dilakukan secara manual maupun otomatis, penggunaan layanan pihak ketiga yg menghasilkan klik atau impresi seperti program paid-to-click, paid-to-surf, autosurf, dan click exchange / click club, ataupun software yg sejenis. Sebagai catatan, melakukan klik terhadap ad unitsi sendiri juga dilarang. Segala bentuk pelanggaran terhadap aturan ini dapat mengakibatkan keanggotaan AdSense Anda dihapuskan.

Mendorong Terjadinya Klik

Untuk meyakinkan hasil yg optimal baik bagi pemasang iklan maupun pengunjung situs, publisher tidak diperbolehkan untuk meminta pengunjung mengklik iklan AdSense yg ada pada situs mereka ataupun menggunakan cara2 yg tersembunyi untuk menghasilkan klik. Jika dijabarkan, publisher AdSense:

  • Tidak diperbolehkan untuk mendorong pengunjung mengklik ad units mereka dengan menggunakan kata2 seperti “click the ads,” “support us,” “visit these links,” dan kata2 lain yg sejenis.

  • Tidak diperbolehkan untuk menarik perhatian pengunjung ke iklan yg ada dengan menggunakan panah atau gambar2 lain yg sejenis.

  • Tidak diperbolehkan untuk meletakkan gambar di sekitar ad units yg dapat membuat pengunjung mengira bahwa gambar tersebut adalah bagian dari iklan.

  • Tidak diperbolehkan untuk mempromosikan situs yg memasang ad units AdSense melalui spam ataupun cara2 yg tidak benar pada situs lain.

  • Tidak diperbolehkan untuk memberi komisi kepada pengunjung untuk mengklik iklan ataupun melakukan search pada Google For Search.

  • Tidak diperbolehkan untuk memasang label di atas ad units AdSense yg dapat menyebabkan kesalahpahaman. Sebagai contoh, ad units boleh ditandai dengan “Sponsored Links”, tapi tidak dengan “Favorite Sites”.

Isi Situs

Publisher hanya diperbolehkan untuk memasang iklan AdSense pada situs2 yg mengikuti aturan Google, selain itu, iklan tidak boleh dipasang pada halaman dimana isi utamanya menggunakan bahasa yg tidak didukung oleh Google AdSense (termasuk Indonesia).

Ad unit AdSense tidak boleh dipasang pada situs yg mengandung:

  • Kekerasan, rasis, atau saran untuk melawan/membenci orang lain, grup, maupun organisasi.

  • Pornografi dan hal2 yg bersifat dewasa.

  • Hacking/cracking.

  • Obat2an terlarang.

  • Kata2 kotor yg berlebihan.

  • Judi dan kasino.

  • Ajakan atau tawaran komisi/kompensasi kepada pengunjung untuk mengklik iklan atau tawaran, melakukan search, membrowsing situs (autosurf, paid-to-surf, dll), maupun membaca email (paid-to-read email).

  • Penggunaan kata kunci yg berulang, berlebihan, maupun tidak relevan dengan situs, baik pada content maupun kode halaman (HTML).

  • Menipu atau memanipulasi isi halaman untuk meningkatkan ranking mesin pencari dari situs yg bersangkutan.

  • Menjual atau menawarkan senjata maupun amunisinya.

  • Menjual atau menawarkan bir atau minuman dengan kadar alkohol tinggi.

  • Menjual atau menawarkan rokok atau produk2 yg berhubungan dng rokok.

  • Menjual atau menawarkan obat2an terlarang.

  • Menjual atau menawarkan replikasi atau imitasi dari suatu produk.

  • Menjual atau menawarkan tugas kuliah, skripsi, dan sejenisnya.

  • Berisi atau mempromosikan hal2 yg bersifat ilegal / melanggar hukum.

Materi Yg Dilindungi Hukum

Publisher tidak diperbolehkan untuk memasang ad units AdSense pada situs yg berisi materi2 yg dilindungi oleh hukum, kecuali mereka memiliki ijin untuk itu. Hukum yg digunakan adalah hukum DMCA, mengenai digital media.

Aturan Webmaster


Publisher AdSense diwajibkan untuk memenuhi aturan kualitas webmaster yg tercantum pada http://www.google.com/webmasters/guidelines.html.

Penggunaan Situs dan Iklan


Situs yg menggunakan iklan AdSense disarankan untuk memiliki navigasi yg mudah untuk pengunjung dan tidak mengandung pop-up yg berlebihan. Pemasangan kode AdSense juga harus sesuai dengan yg diberikan, tanpa adanya modifikasi apapun. Ini termasuk tidak diperbolehkannya untuk mengubah perilaku / cara kerja iklan dalam bentuk apa pun.


  • Situs yg menggunakan ad units AdSense tidak boleh menggunakan pop-up atau pop-under yg mengganggu pengunjung, menarik minat pengunjung, merubah setting browser, me-redirect pengunjung ke situs lain, maupun melakukan proses download.

  • Kode AdSense harus dipasang sesuai dng yg diberikan tanpa adanya modifikasi. Publisher tidak diperbolehkan untuk mengubah bagian apapun dari kode tersebut atau merubah cara kerja kode, pentargetan, ataupun penampilan iklan. Sebagi contoh, klik pada iklan AdSense tidak boleh terbuka pada jendela browser baru.

  • Situs atau suatu perusahaan tidak diperbolehkan untuk menampilkan iklan AdSense, search box AdSense, hasil pencarian, dan tombol referral pada aplikasi / software apapun, termasuk toolbar.

  • Situs yg menggunakan iklan AdSense tidak boleh mendapatkan trafik dari situs / software lain dengan cara2 yg tidak alami, seperti pop-up, redirect, dan sejenisnya.

  • Penawaran referral harus dilakukan tanpa adanya tawaran atau perjanjian tertentu dengan pengunjung. Publisher juga tidak diperbolehkan untuk meminta alamat email dari pengunjung yg menjaid referral AdSense mereka.

Penempatan Iklan


AdSense menawarkan beberapa format iklan yg dapat digunakan oleh publisher. Publisher disarankan untuk bereksperimen dengan berbagai penempatan iklan, tanpa melanggar aturan2 berikut:


  • Maksimal tiga ad units dalam satu halaman.

  • Maksimal dua search box Google AdSense for Search dalam satu halaman.

  • Maksimal satu link units dalam satu halaman.

  • Maksimal dua referral units dari masing2 produk referral yg ada.

  • Hasil pencarian AdSense for Search hanya boleh ditampilkan pada halaman yg mengandung maksimal satu link units.

  • Tidak diletakkan pada pop-up, pop-under, maupun email.

  • Tidak ada elemen halaman apapun yg menutupi sebagian/seluruh bagian iklan.

  • Iklan AdSense apapun tidak boleh diletakkan pada halaman yg tidak berisi apa2.

  • Iklan AdSense apapun tidak boleh diletakkan pada halaman yg dibuat sepenuhnya dalam rangka untuk menampilkan iklan (MFA), tidak peduli apakah isi halaman tersebut relevan atau tidak.

Iklan atau Layanan Dari Pihak Lain


Untuk menghindari kebingungan pengunjung, Google tidak memperbolehkan untuk memasang iklan maupun search box AdSense pada situs yg juga mengandung iklan maupun search box dari pihak lain yg menggunakan format tampilan (bentuk, ukuran, dan warna) yg sama dengan iklan dan search box AdSense yg ada di halaman tersebut.


baca disini untuk tau pendapatan dan cara pembayaran Google adsense, juga penjelasan singkat tentang Google adsense

Minggu, 01 Januari 2012

Cara Root Samsung Galaxy Y (Galaxy Young) S5360 :

*download file update.zip ( http://www.multiupload.com/WODBRZX6CM )
* copy update.zip ke root sdcard/
* Matikan HP Samsung galaxy Young
* tekan tombol volume up + home + power, tekan dan tahan sampe layar hidup
* Samsung Galaxy Young hidup dalam recovery mode, kalau bukan harus ulangi lagi step sebelumnya
* pilih apply update from sd card, gunakan tombol volume utk pilih-pilih dan tombol home untuk "ok".
* pilih file update.zip yang tadi
* kalau sudah selesai, bakal balik lagi ke menu utama, dan pilih reboot now
* cek di list applikasi, udah ada app superuser apa belum, kalo sudah ada, berarti HP Samsung galaxy Y kamu berhasil di Root

*sumber : http://www.kaskus.us/showpost.php?p=537721574&postcount=783
Cara UnRoot HP Samsung Galaxy Y (Galaxy Young) S5360 :

*download update-unroot.zip script updated (http://www.multiupload.com/PJ7F5APNVT)
* copy update.zip ke root sdcard/
* Matikan
HP Samsung galaxy Young
* tekan tombol volume up + home + power, tekan dan tahan sampe layar hidup
* Samsung Galaxy Young hidup dalam recovery mode, kalau bukan harus ulangi lagi step sebelumnya
* pilih apply update from sd card, gunakan tombol volume utk pilih-pilih dan tombol home untuk "ok".
* pilih file update-unroot.zip yang tadi
*
kalau sudah selesai, bakal balik lagi ke menu utama, dan pilih reboot now
* Samsung Galaxy Young udah ter-unRoot (test aja pake terminal emulator (ketik-->> su )

*sumber : http://www.kaskus.us/showpost.php?p=547100143&postcount=1147

Samsung GALAXY Y Samsung S5360


Awali hidup baru pintar Anda dengan Samsung GALAXY Y Samsung S5360 untuk Anda yang muda dan dinamis dimana saja dan ingin tetap berhubungan dan terhubung. Dilengkapi dengan sistem operasi Android terkini dengan aplikasi menarik, download lebih cepat, konektivitas Wi-Fi dan intuitif yang lebih menarik. Akses aplikasi berbasis web dan mobile internet dengan lebih mudah untuk generasi baru yang selalu bergerak.
Powerful & Compact

Powerful & Compact

Kinerja yang kuat berpadu dalam gaya, desain kompak dalam prosesor Samsung GALAXY Y. Dengan prosesor yang lebih kuat, kecepatan download 7,2Mbps membuat ponsel ini menjadi pemenang. Dilengkapi dengan bodi kompak yang menarik dan layar 3" yang membuat Anda merasa nyaman saat melihat video dan bermain game.
Rich Smart Experience

Rich Smart Experience

Dengan sistem operasi Android yang paling up-to-date memberikan pengalaman pengguna yang halus dan dilengkapi dengan layanan Google Mobile yang menakjubkan antarmuka aplikasi berbasis web dengan berbagai pilihan dalam hiburan, rekreasi dan pilihan gaya hidup. Social Hub mengintegrasikan teks, pesan, email dan update SNS menjadi satu portal tunggal untuk diakses setiap saat. Free Samsung Apps (dan yang berbayar) keduanya berguna dan berharga dan membuat hidup Anda menjadi lebih mudah dan menyenangkan.
Smart but Easy-to-Use

Smart but Easy-to-Use

Nikmati TouchWiz UI yang mengesankan secara visual dan penyempurnaan interface yang lebih berwarna. Anda dapat sesukanya menyesuaikan homescreen Anda karena Anda mengetahui fitur, aplikasi dan konten yang paling penting bagi Anda. Fungsi Multi-touch zoom untuk web browsing dapat memperbesar halaman website dan memperoleh setiap detil. Anda juga dapat mencari aplikasi dan daftar kontak Anda dengan teks atau suara untuk menemukan apa pun atau siapapun yang Anda inginkan.
Colour your smart life

Colour your smart life

Berbagai pilihan warna memenuhi berbagai kebutuhan Anda. Cocokkan warna dengan suasana hati Anda, dan ekspresikan diri dengan Samsung GALAXY Y.
* Pilihan warna dapat bervariasi pada masing-masing negara

WiFi and Tethering

 WiFi and Tethering
Tetap terhubung dengan dua pilihan wireless dan wired yang tersedia pada Samsung GALAXY Y. Tak perlu khawatir mengenai terhubung Internet dengan Wi-Fi (b/g/n) untuk koneksi wireless yang lebih stabil dan aman sehingga Anda dapat mengirim dan mengakses rekening secara online kapan saja. Aplikasi tethering juga memungkinkan berbagi koneksi Internet tablet atau laptop melalui ponsel Anda
Quick type by SWYPE

Quick type by SWYPE

Samsung GALAXY Y ini dilengkapi dengan fitur Swype, interface cerdas yang menghubungkan titik-titik yang dibuat jari Anda untuk mencari tahu apa yang coba ditulis.
2MP Camera

2MP Camera

Ambil gambar dengan kamera 2MP dan mulailah berbagi foto melalui jejaring sosial favoritmu dengan segera.

Harga Samsung Galaxy Y S5360 sekitar 1.2 juta. 

Motorola RAZR:Smartphone LIfestyle Beraroma Tablet


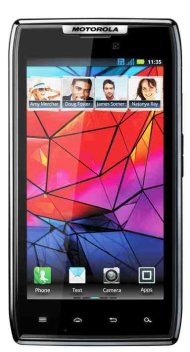
REPUBLIKA.CO.ID,JAKARTA--Smartphone lifestyle. Ini barangkali citra yang dilekatkan Motorola Mobility untuk ponsel terbarunya, Motorola RAZR.
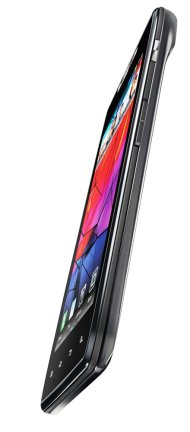
Mengikuti konsep RAZR yang diilhami tipisnya pisau silet, RAZR terbaru memiliki tebal 7.1 milimeter. wajar saja jika  Regional Sales Manager for South East Asia Mobile Devices Motorola Mobilty Tr
acy Yeoh, mengklaimnya sebagai smartphone paling tipis di dunia saat ini.Lekukan yang ada di ponsel candy bar ini tampak seksi dan elegan. Ketiga digenggam ia terasa berbeda dengan ponsel yang ada di pasaran saat ini.  Ini antara lain berkat lapisan serat kevlar yang membalut bodinya. Kevlar adalah bahan material untuk rompi anti peluru yang biasa digunakan polisi dan tentara.
Kesan kokoh makin menguat tatkala kita memperhatikan antigores yang dibenamkan ke ponsel ini. Layar berdiameter 4,3 milimeter dibalut dengan Corning Gorilla Glass berikut dengan splash-guard coating. Dengan pelapis ini, ponsel tidak saja tahan goresan atau debu, tetapi juga tahan air.
Ketika berada ditangan dan Anda mencoba mengoperasikan, kesan berbeda barangkali akan muncul. Ini smartphone atau tablet. Dengan lebar 4.3 milimeter, layar hyper-vibrant 4.3-inch Super AMOLED Advanced mampu menghadirkan tampilan yang optimal, baik untuk foto, grafis hingga video.
Teknologi layar sentuh yang dibenamkan Motorola di device ini, berbeda dengan kebanyakan smarthone. Membuka aplikasi, mmbuka imel hingga melakukan editing gambar sangat nyaman sekali. Cukup dengan gerakan lembut jari-jari. Ini barangkali salah satu kelebihan teknologi layar sentuh Motorola.
Tinginya sensitifitas layar sentuh Motorola tampaknya mengungguli sensitivitas produk smartphone sejenis. Dalam berapa kasus, untuk membuka satu aplikasi atau mengetik naskah seringkali tidak bisa dilakukan dengan cepat. Seseorang harus menekan display.
Maksudnya saat jari menekan display, device seperti membaca apa yang diinginkan jari-jari. Sekalipun dalam hitungan detik. Pada Moto RAZR, ketika jari menyentuh display pada saat yang sama device sudah tahu apa yang diinginkan. Singkatnya, respon RAZR lebih cepat dinandungkan dengan smartphone sejenis seperti iPhone 4 atau smartphone terbaru Samsung dan HTC.
Layar yang lebar dengan layar sentuh yang sangat nyaman, seringkali membuat penggunanya sulit membedakan antara smartphone dengan tablet. Bagi pengguna yang terbiasa dengan smartphone berdiameter kecil, menggunakan RAZR seperti menggunakan tablet. Sementara mereka yang biasa menggunakan tablet, mereka seperti mendapatkan pengalaman baru saat menggunakan device ini.
Bekerja dengan prosesor dual-core 1.2 GHz yang berjalan pada sistem operasi Android 2.3.5 (Gingerbread) dengan RAM sebesar 1 GB, RAZR nyaman untuk melakukan berbagai aktivitas menggunakan ponsel.  Interface yang simpel membantu pengguna untuk melakukan elaborasi dan mengoperasikan aplikasi yang ada. Ponsel ini juga nyaman untuk multitasking.
Sebagaimana smartphone terkini, Motorola juga mengedepankan kemudahan berkomunikasi secara real time melalui berbagai media. Pengguna selalu terhubung dengan siapa saja. Tak perlu kecewa, karena tidak bisa melakukan kon
tak karena RAZR sedang digunakan menelepon. Smart Action yang ada di ponsel ini akan mengirimkan SMS kepada penelepon bila pengguna RAZR tak sempat menjawab telepon.Motorola juga mengembangkan sedemikian rupa aplikasi media sosial. Tak mengherankan jika sejumlah aplikasi terkoneksi langsung dengan media sosial tersebut. Misalnya saja saat Anda mendengarkan musik, Anda bisa berbagi informasi mengenai musik yang didengarkan melalui facebook cukup dengan satu sentuhan tanpa harus membuka akun facebook Anda.
Ketika Anda mendengarkan sebuah lagu, Anda bisa mendapatkan berbagai informasi mengenai lagu, bila ponsel telah terhubung dengan akses internet. Katakanlah Anda mendengarkan lagunya Ayu Tingting, Anda akan dengan mudah mendapatkan informasi tambahan soal lagu lain yang dinyanyikan penyanyi yang sama, lirik, atau foto. Mendapatkan video artis yang sama di Youtube bisa dilakukan dengan satu sentuhan.
Untuk musik sendiri, Motorola kembali unjukgigi. Ponsel ini seperti mewakili produk Motorola yang sangat mumpuni untuk urusan multimedia.RAZR tidak saja mampu menghadirkan kualitas audio yang mumpuni bahkan mampu mengalahkan ponsel musik premium seperti iPhone 4, ponsel ini juga menwarkan kustomisasi yang unik.
Tanpa mengubah seting, pengguna akan menikmati musik dengan format 3D stereo. Bila ingin lebih terdapat seting manual. Tinggal pilih efek audio mana yang diminati, home theatre, live stage, custome, surround live, wide atau ambient. Pengguna bisa mengatur equalizer untuk mendapatkan efek tertentu, seperti extreme bass, bass punch, balanced, brilliant treble, vocalizer
Pada paket penjualan, Motorola menyediakan headset. Headsat bawaan cukup memadai untuk menikmati kualitas audio ponsel ini. Namun disarakan menggunakan headset yang lebih baik untuk bisa menikmati kualitas musik yang sangat baik ponsel ini.
Menikmati musik dengan volume kecil, sedang atau keras sama nikmatnya. Uniknya, semakin keras volume semakin jernih musik yang dideliver ponsel ini. Ini barangkali kelebihan lain yang dimiliki Motorola dan dimiliki ponsel lain. Umumnya semaki  keras volume, semakin nggak enak didengarkan ditelinga.
Tak hanya musik yang nyaman. Kenyamanan juga bisa dirasakan saat menikmati video. Layar berdiameter 4.3 inci qHD Super AMOLED Advanced dengan resolusi 960x540 mampu menghadirkan kualitas gambar high definition yang utuh. Menariknya, ponsel ini juga telah mendukung HDMI.
Kenikmatan yang sama bisa dinikmati saat kita membuka video streaming. Youtube, misalnya. Bila jaringan memadai dan mendukung, kita bisa menikmati tayangan streaming Youtube yang tajam dan jernih dengan kualitas audio yang baik.
Motorola juga menyediakan kamera 8MP dengan LED Flash. Kamera ini bisa digunakan untuk merekam video dengan kecepatan hingga 30 fps dengan format 1080 HD. Untuk pemula, ponsel ini mampu menghasilkan rekaman video dengan kualitas semi pro.
RAZR tampaknya menjadi titik balik bagi Motorola untuk menghadirkan ponsel dengan kualitas multimedia yang mumpuni. Ia sekaligus merefleksikan kecanggihan teknologi Motorola. Bagaimanapun juga, Motorola telah mampu menjawab berbagai kelemahan Android di aspek multimedia, yang banyak dikeluhkan para pengguna ponsel berbasis Android.

Spesifikasi

Form Factor Full Touch Screen                                                       
Dimensions    69mm wide x 131mm long x 7.1mm thin
Weight    127g
Battery1    1750/1780mAh (non-removable)
Memory2     1GB  DDR2 SDRAM / 16GB on board (16GB eMMC NAND Flash)
        supports up to 32GB microSD
OS        Android 2.3.5 Gingerbread
Display     4.3" qHD (960x540) Super AMOLED Advanced
Bands/Modes    WCDMA 2100/850/900/1900, GSM 850/900/1800/1900,
        HSDPA 14.4 Mbps (Cat.10), HSUPA 5.76 Mbps (Cat.6), GPRS Class12
Messaging    MMS, SMS, Email (Corporate Sync, Gmail™, POP3/IMAP embedded, Push Email)
Camera    (rear) 8MP Camera with LED flash, (front) 1.3MP HD Web Cam
Processor    Dual Core 1.2GHz Processor
Connectivity     3.5mm, micro USB 2.0 HS, Corporate Sync, BOTA, Wi-Fi 2.4GHz & 5GHz                 802.11a/b/g/n, Stereo Bluetooth®Class 2, Version 4.0 LE + EDR , DLNA,                 HDMI port    Sensor    3-axis accelerometer, proximity sensor, Ambient             Light sensor
Browser    Android Web Kit with Adobe® Flash® Player
Video Playback
    - MPEG4 ASP/SP up to 20Mbps, 1080p at 30fps
    - H.263 BP up to 4Mbps, 4CIF at 30fps
    - H.264 BP/MP/HP up to 20Mbps, 1080p at 30fps
    - VC-1 Advanced MP up to 20Mbps, 1080p at 30fps
    - Xvid MPEG-4 ASP up to 4Mbps D1 at 30fps
    -VP8/WebM
Capture
     - Video H.264 up to 16Mbps, 1080p @30fps
     - Audio AAC up to 64kbps, 44.1kHz, Stereo
Streaming
    - VGA in MPEG4, H.264, H.263 @30 fps
    - MPEG4, H.263, H.264
Audio     AAC, AAC+, AAC+ Enhanced, AMR NB, AMR WB, MIDI, MP3, WAV, WMA v10, WMA v9
Location Service     Tmapor OllehNavi, eCompass, aGPS with Google Maps™, Google Latitude™

Kaleidoskop Teknologi 2011 : Sony dan Ericsson Berpisah

Ghiboo.com - Sebuah tulisan dari Wall Stret Journal pada Agustus 2011 tentang hilangnya nama Sony Ericsson, bukanlah pepesan kosong. Akhirnya tulisan itu menjadi kenyataan di mana Sony kini menjadi pemilik tunggal, tanpa ada embel-embel Ericsson. Saat itu, Sony baru saja membeli seluruh saham Ericsson sebanyak 50%.

Jika sebelumnya, laptop, konsol game, pemutar musik hanya bernama Sony, maka tahun depan, nama untuk smartphone akan bernama Sony. Sebuah peristiwa besar tentunya dalam perkembangan teknologi selama 2011. Siapa sangka dua sejoli yang sempat berjaya ini kini berpisah.

Konsekuensinya adalah rumor yang belakangan muncul akan kehadiran smartphone baru yang biasa disebut Sony Ericsson, kini hanya bernama Sony saja. Ada yang bersatu, ada pula yang berpisah, itulah yang terjadi antara Sony dan Ericsson.

Kaleidoskop Teknologi 2011 : Perginya Sang Inovator


Ghiboo.com - Entah bagaimana menjelaskannya. Setelah mengotaki lahirnya iPhone 4S, 5 Oktober 2011, Steve Jobs meninggal dunia. 

Dua tahun sebelumnya, Jobs sudah divonis menderita kanker pankreas, dan hal inilah yang diduga sebagai penyebab kematiannya., tapi itulah Steve Jobs, seorang inovator yang membuat para pesaingnya selalu menciptakan tandingan dari apa yang ada di pikirannya. Penggemar Apple di Indonesia pun ikut berduka.

Selain di Apple, Jobs juga seorang CEO di Pixar Animation Studios yang telah sukses mengeluarkan beberapa film animasi, seperti Toy Story dan Finding Nemo. Dibalik semua itu, meskipun menderita sakit bertahun-tahun, ia tetap bisa mendulang sukses berkat ide, dan rasa hormat yang diberikan kepada pria yang akrab dengan sweater lusuhnya ini.

Meski tiada sebuah penghormatan besar diberikan dari "lawan-lawannya." Bill Gates dari Microsoft, bahkan Bos Samsung yang terus berperang soal hak paten pun sampai menunda peluncuran smartphone terbarunya beberapa waktu.​

Samsung Galaxy Tab 7.0 Plus Spesifikasi Harga


Samsung Galaxy Tab 7.0 Plus Spesifikasi Harga - Pecinta tablet Samsung, harap bersabar karena gadget terbaru Samsung Galaxy Tab 7.0 Plus tanggal 5 November 2011 nanti akan tiba di tanah air. Produk Samsung Galaxy Tab 7.0 Plus ini merupakan kelanjutan dari Galaxy Tab 7.0, yang sudah diluncurkan pada tahun lalu.
Samsung Galaxy Tab 7.0 Plus

Jika diperhatikan, dalam satu tahun terakhir Samsung sudah merilis empat jenis tablet di Tanah Air. Mulai dari Samsung Galaxy Tab 7.0 pada Oktober 2010, Galaxy Tab 10,1 inci di bulan Juli 2011, Galaxy Tab 8,9 inci pada awal Oktober lalu, dan Samsung Galaxy Tab 7.0 Plus.

Samsung Galaxy Tab 7.0 Plus hadir dengan sistem operasi Android Honeycomb 3.2 dengan dukungan prosessor dual core 1.2GHz dan RAM 1GB. Samsung Galaxy Tab 7.0 Plus memiliki layar sentuh berukuran 7 inci dengan resolusi 1024 x 600 piksel.

Samsung Galaxy Tab 7.0 Plus dilengkapi juga dengan kamera utama 3 megapiksel, kamera depan 2 megapiksel, Wi-Fi 802.11 a/b/g/n, GPS, Bluetooth 3.0, dan baterai berkapasitas 4000mAh.

Samsung Galaxy Tab 7.0 Plus tablet Android yang memiliki bobot seberat 345 gram ini hadir dengan dua varian yakni 16GB dan 32GB.

Spesifikasi Samsung Galaxy Tab 7.0 Plus

General Network 2G : GSM 850 / 900 / 1800 / 1900
3G : HSDPA 900 / 1900 / 2100
Announced 2011, 3Q
Processor Dual-core 1.2 GHz processor
SAR Rating
Color Available Black, White
Size Dimensions (mm) 193.7 x 122.4 x 9.9
Weight (g) 345
Display Type PLS LCD capacitive touchscreen, 16M colors
Size 600 x 1024 pixels, 7.0 inches (~170 ppi pixel density)
Lines 0
Menu Touchscreen : TouchWiz UX UI
Design Type Tablet
Antenna Fixed Internal
Keys Navigation Touchscreen : Multi Touch
QWERTY No
Soft
Other Accelerometer, Proximity, Three-axis Gyro sensor
Lighting
Memory Phonebook Practically unlimited entries and fields
Internal (MB) 16/32 GB storage, 1GB RAM
Expansion microSD, up to 64GB
Battery Type Standard battery, Li-Ion 4000 mAh
Stand-by (hrs)
TalkTime(min)
Ringtones Polyphonic
Customization Yes
Audio Format MP3/WAV/eAAC+/OGG/WMA/AC3
MP3 Player Yes
Voice
FM Radio No
A2DP Yes
Video Format MP4/DivX/Xvid/H.264/H.263/WMV
Recorder Yes, 720p@30fps
TV Null
Entertainment Games Yes, Downloadable
Messaging SMS Yes
Total SMS
MMS Yes
EMS Yes
Email Yes, Email, Push Email
IM
Push-To-Talk
Connectivity HSDPA Yes, HSDPA, 21 Mbps; HSUPA, 5.76 Mbps
EDGE Yes
Bluetooth Yes, v3.0
3G Yes
GPRS Yes
Infrared (IrDA) No
USB Port Yes
WIFI/WLAN Yes, Wi-Fi 802.11 a/b/g/n, Wi-Fi Direct, dual-band, Wi-Fi hotspot
Data Cable Yes
Data Modem
GPS Yes
Software Java (J2ME) Yes
WAP No Info
Platform OS Android OS - 3.2 Honeycomb
Browser HTML
Predictive Text Entry Predictive text input (Swype)
Speech Codes
PIM Application
Others Application Google Apps, SNS integration, Digital compass, Image/video editor, Quickoffice HD editor/viewer
Personal Themes Yes
Caller ID Yes
Profile ID Yes
Camera Lens Type CMOS, 3.0 Megapixel
Digital zoom
Max. Resolution 2048x1536 pixels
Flash Yes
Night Mode No
Multi Shot
Frame Types
Extra Features Autofocus, Geo Tagging, Smile detection
Photo Format JPG
Front Camera Yes, 2 megapixels
Harga Samsung Galaxy Tab 7.0 Plus
Samsung belum mau menyebutkan harga pasti. "Sekitar di bawah 6 juta lah. Murah kok," kata Eka Anwar Head Marketing Communications Samsung Electronics Indonesia. Pilih mana? Samsung Galaxy Note, Google Nexus Prime atau gadget yang satu ini. 

Lampu Senter yang Tak Lagi Menggunakan Baterai


Ghiboo.com - Selama ini lampu senter menggunakan baterai sebagai sumber dayanya, tapi kali lampu senter tersebut menggunakan sebuah kabel USB ke perangkat port USB maka tenaganya akan terisi ulang kembali.

USB Rechargeable Mini Flashlight adalah sebuah inovasi untuk sebuah lampu senter. Dengan sumber tenaga dari port USB yang sangat baik, maka fungsi dari baterai pada lampu senter bisa tergantikan dengan baik pula. Tugas-tugas yang memaksa kita menggunakan lampu senter seperti saat mati listrik mencari sebuah benda tersembunyi di bawah lemari dan lain-lain menjadi lebih efisien.

Senter mini ini memiliki fitur lampu LED serta baterai internal litihum ion yang bisa diisi ulang hanya dengan menggunakan port USB. Lampu senter ini memiliki ukuran 0.87 x 2.05 inci dan jika kamu ingin mendapatkannya, kita hanya perlu mengeluarkan uang 6.99 USD.